Tag Archives: signal pre-emption

Improving transit speed part 2 – Holladay

A continuation of the last improving transit speed post, which is building off of the discussion over at Portland Transport, and now specifically focusing on people’s suggestions for speeding up travel time along NE Holladay. I hope this provides something of an operational perspective as to why some things are the way they are and that might prove to be a hindrance in redesigning platform placement. These are not necessarily insurmountable obstacles, but are, at the very least, obstacles that prevent any of the suggestions from the Portland Transport post from being enacted immediately.
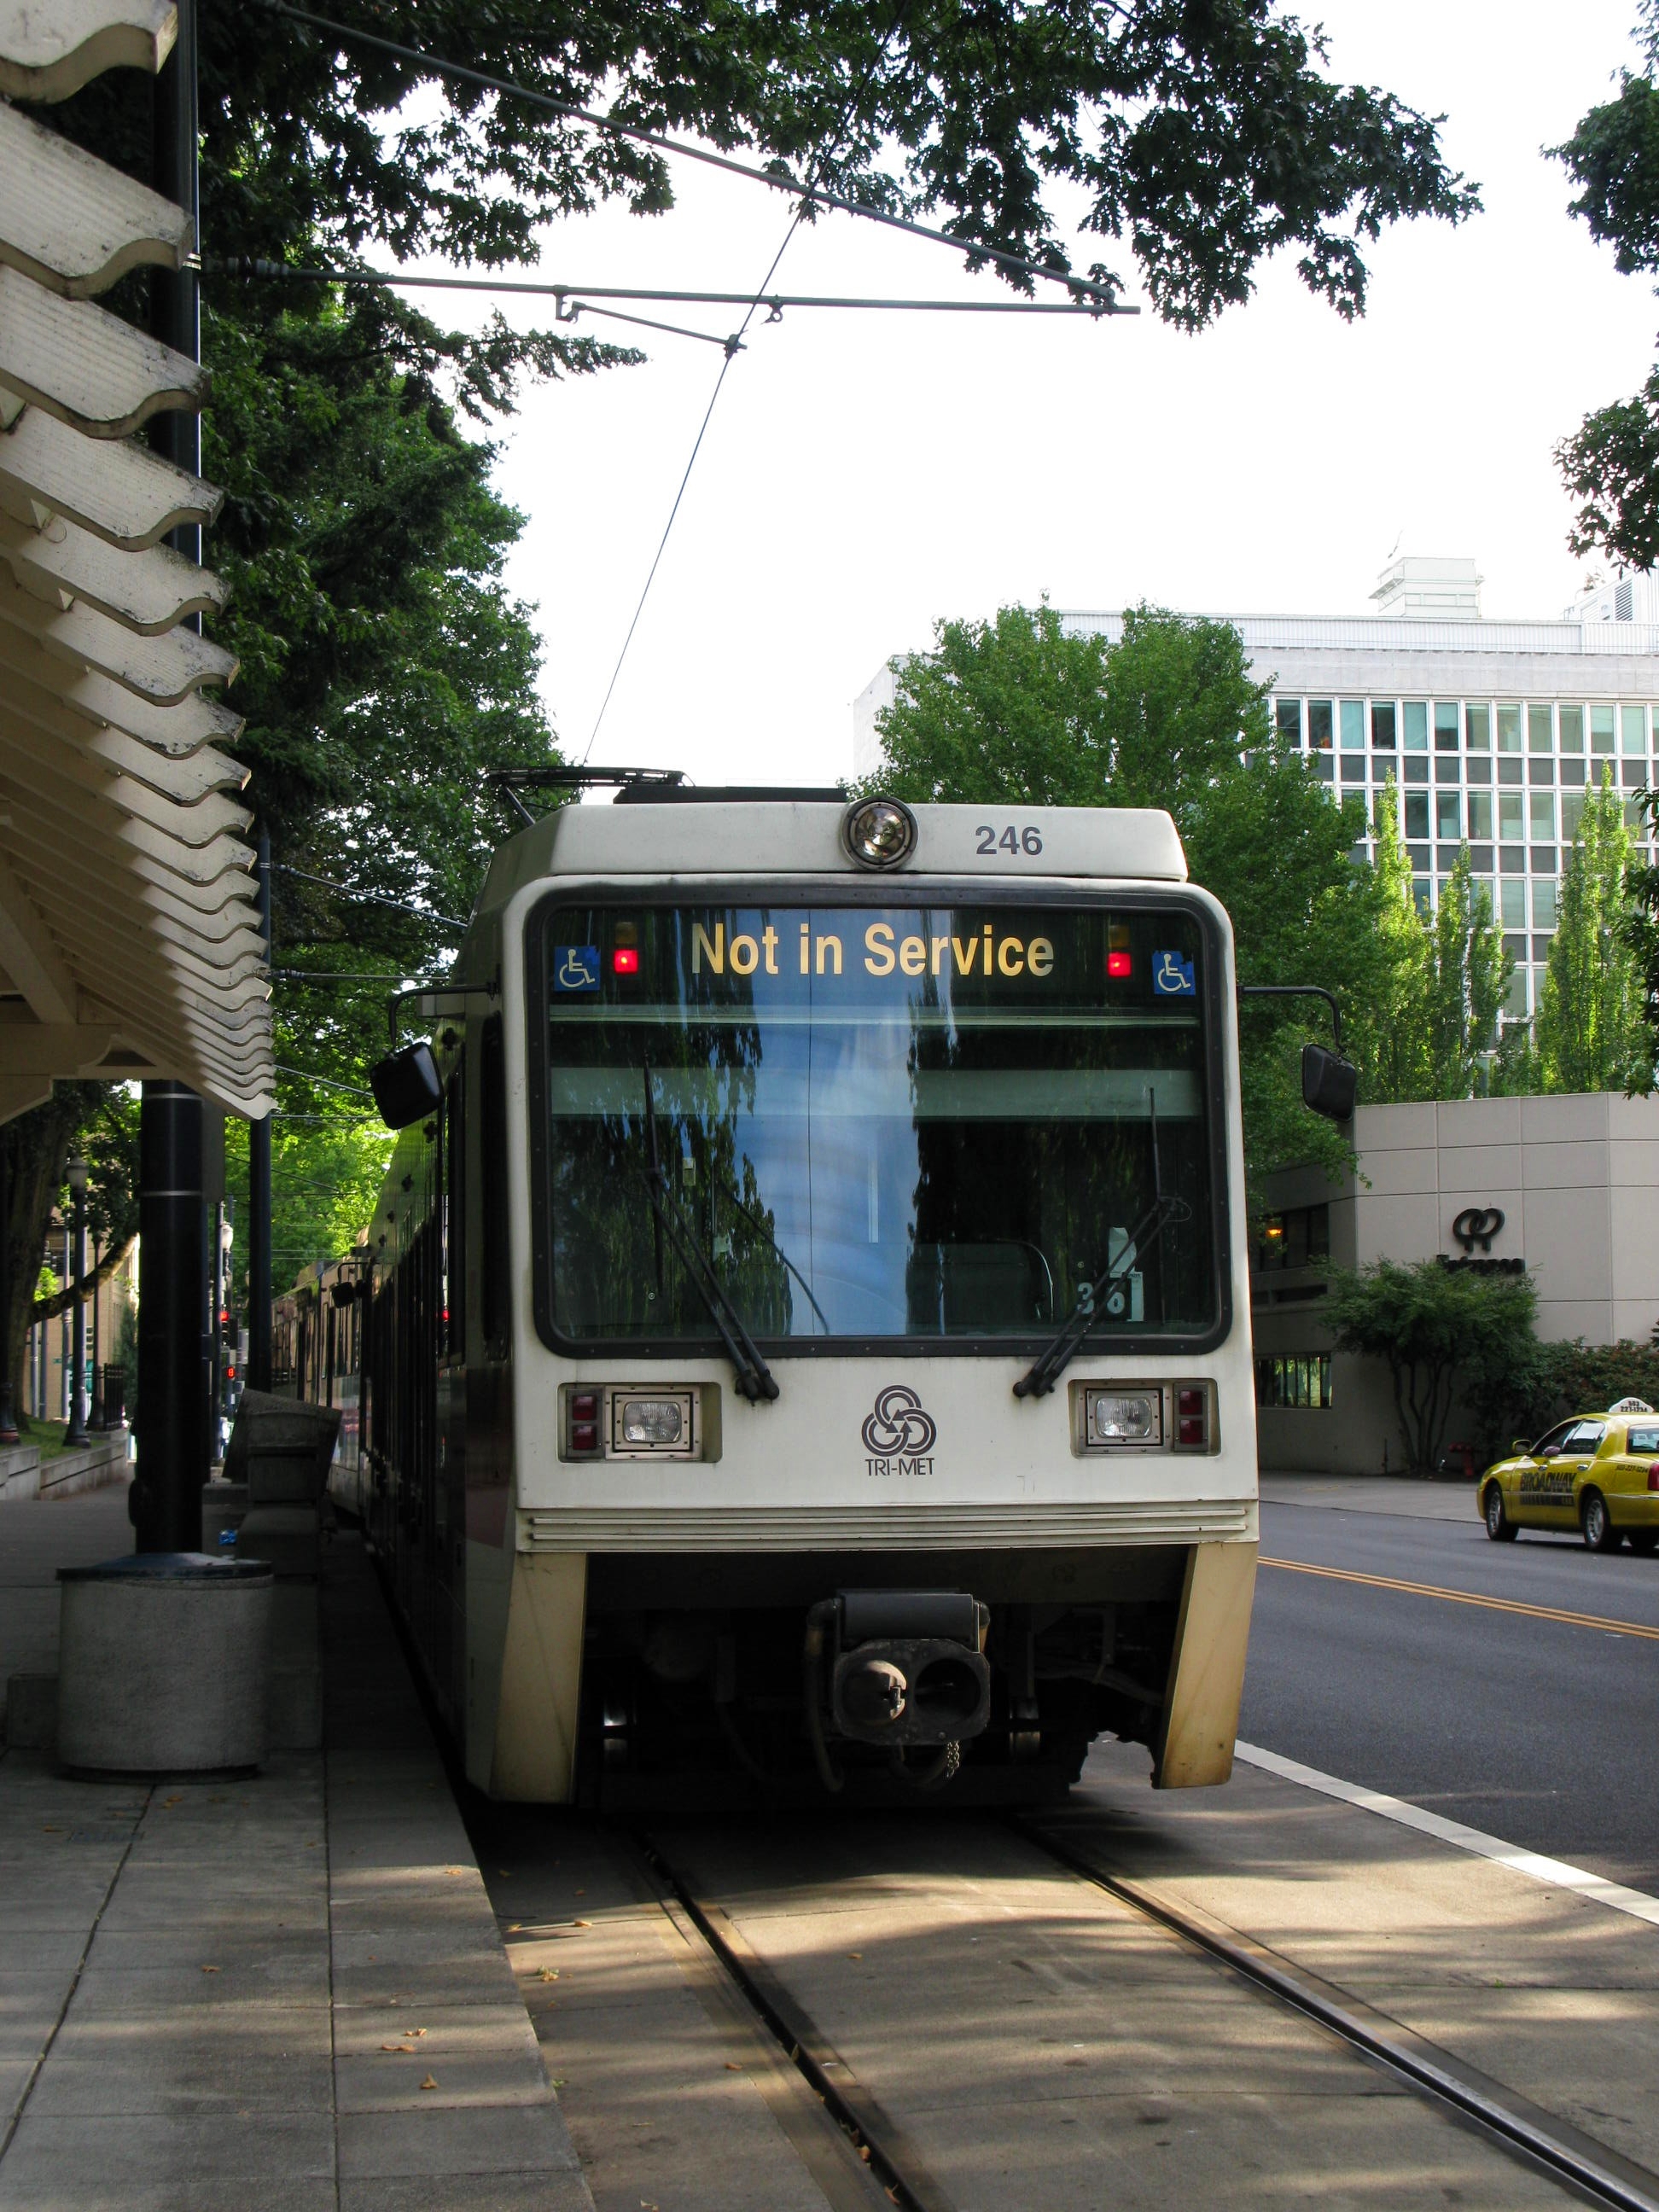
NE 7th Ave and OCC

Courtesy of Portland Transport, here are weekday passenger counts for eastbound stops on Holladay during fall 2010 (westbound not listed but they’re pretty comparable):

Stop—————–Ons—–Offs
Rose Quarter—–1,207—1,035
Convention Ctr.—–433—–595
NE 7th—————396—–764
Lloyd Center——1,000—1,830

Given those lower passenger counts compared to RQ and Lloyd Center, many people have put forth the argument that Convention Center and NE 7th could be closed to speed up travel time on Holladay without severe impact to passengers.

Not permanently…

However, both of those platforms serve an important purpose on Holladay – not so much for passenger loading, but rather as a necessity to travel along this section of the alignment. The short explanation is that those platforms are needed to call signals/switches on Holladay. The long explanation: keep reading.

For one thing, trains at all stops along Holladay need to call the pre-empt signals to proceed, which will then cascade into the next platform. But OCC & NE 7th have an additional complication. The alignment on Holladay from just past Rose Quarter to just before Lloyd Center is between two sets of switches. On the west (click for map), there’s a crossover as well as switches to diverge into the special events track, westbound main, or trolley barn at Rose Quarter. On the eastern side, there are switches to diverge a train into (or out of) the Doubletree Siding. Going back to my earlier posts on signal types, since all of these switches are in pre-empt territory, they are associated with ABS/pre-empt combination signals and are protected by ATS magnets.

Let’s start with the switches into the Doubletree Siding on the eastern side.

NE 7th Ave

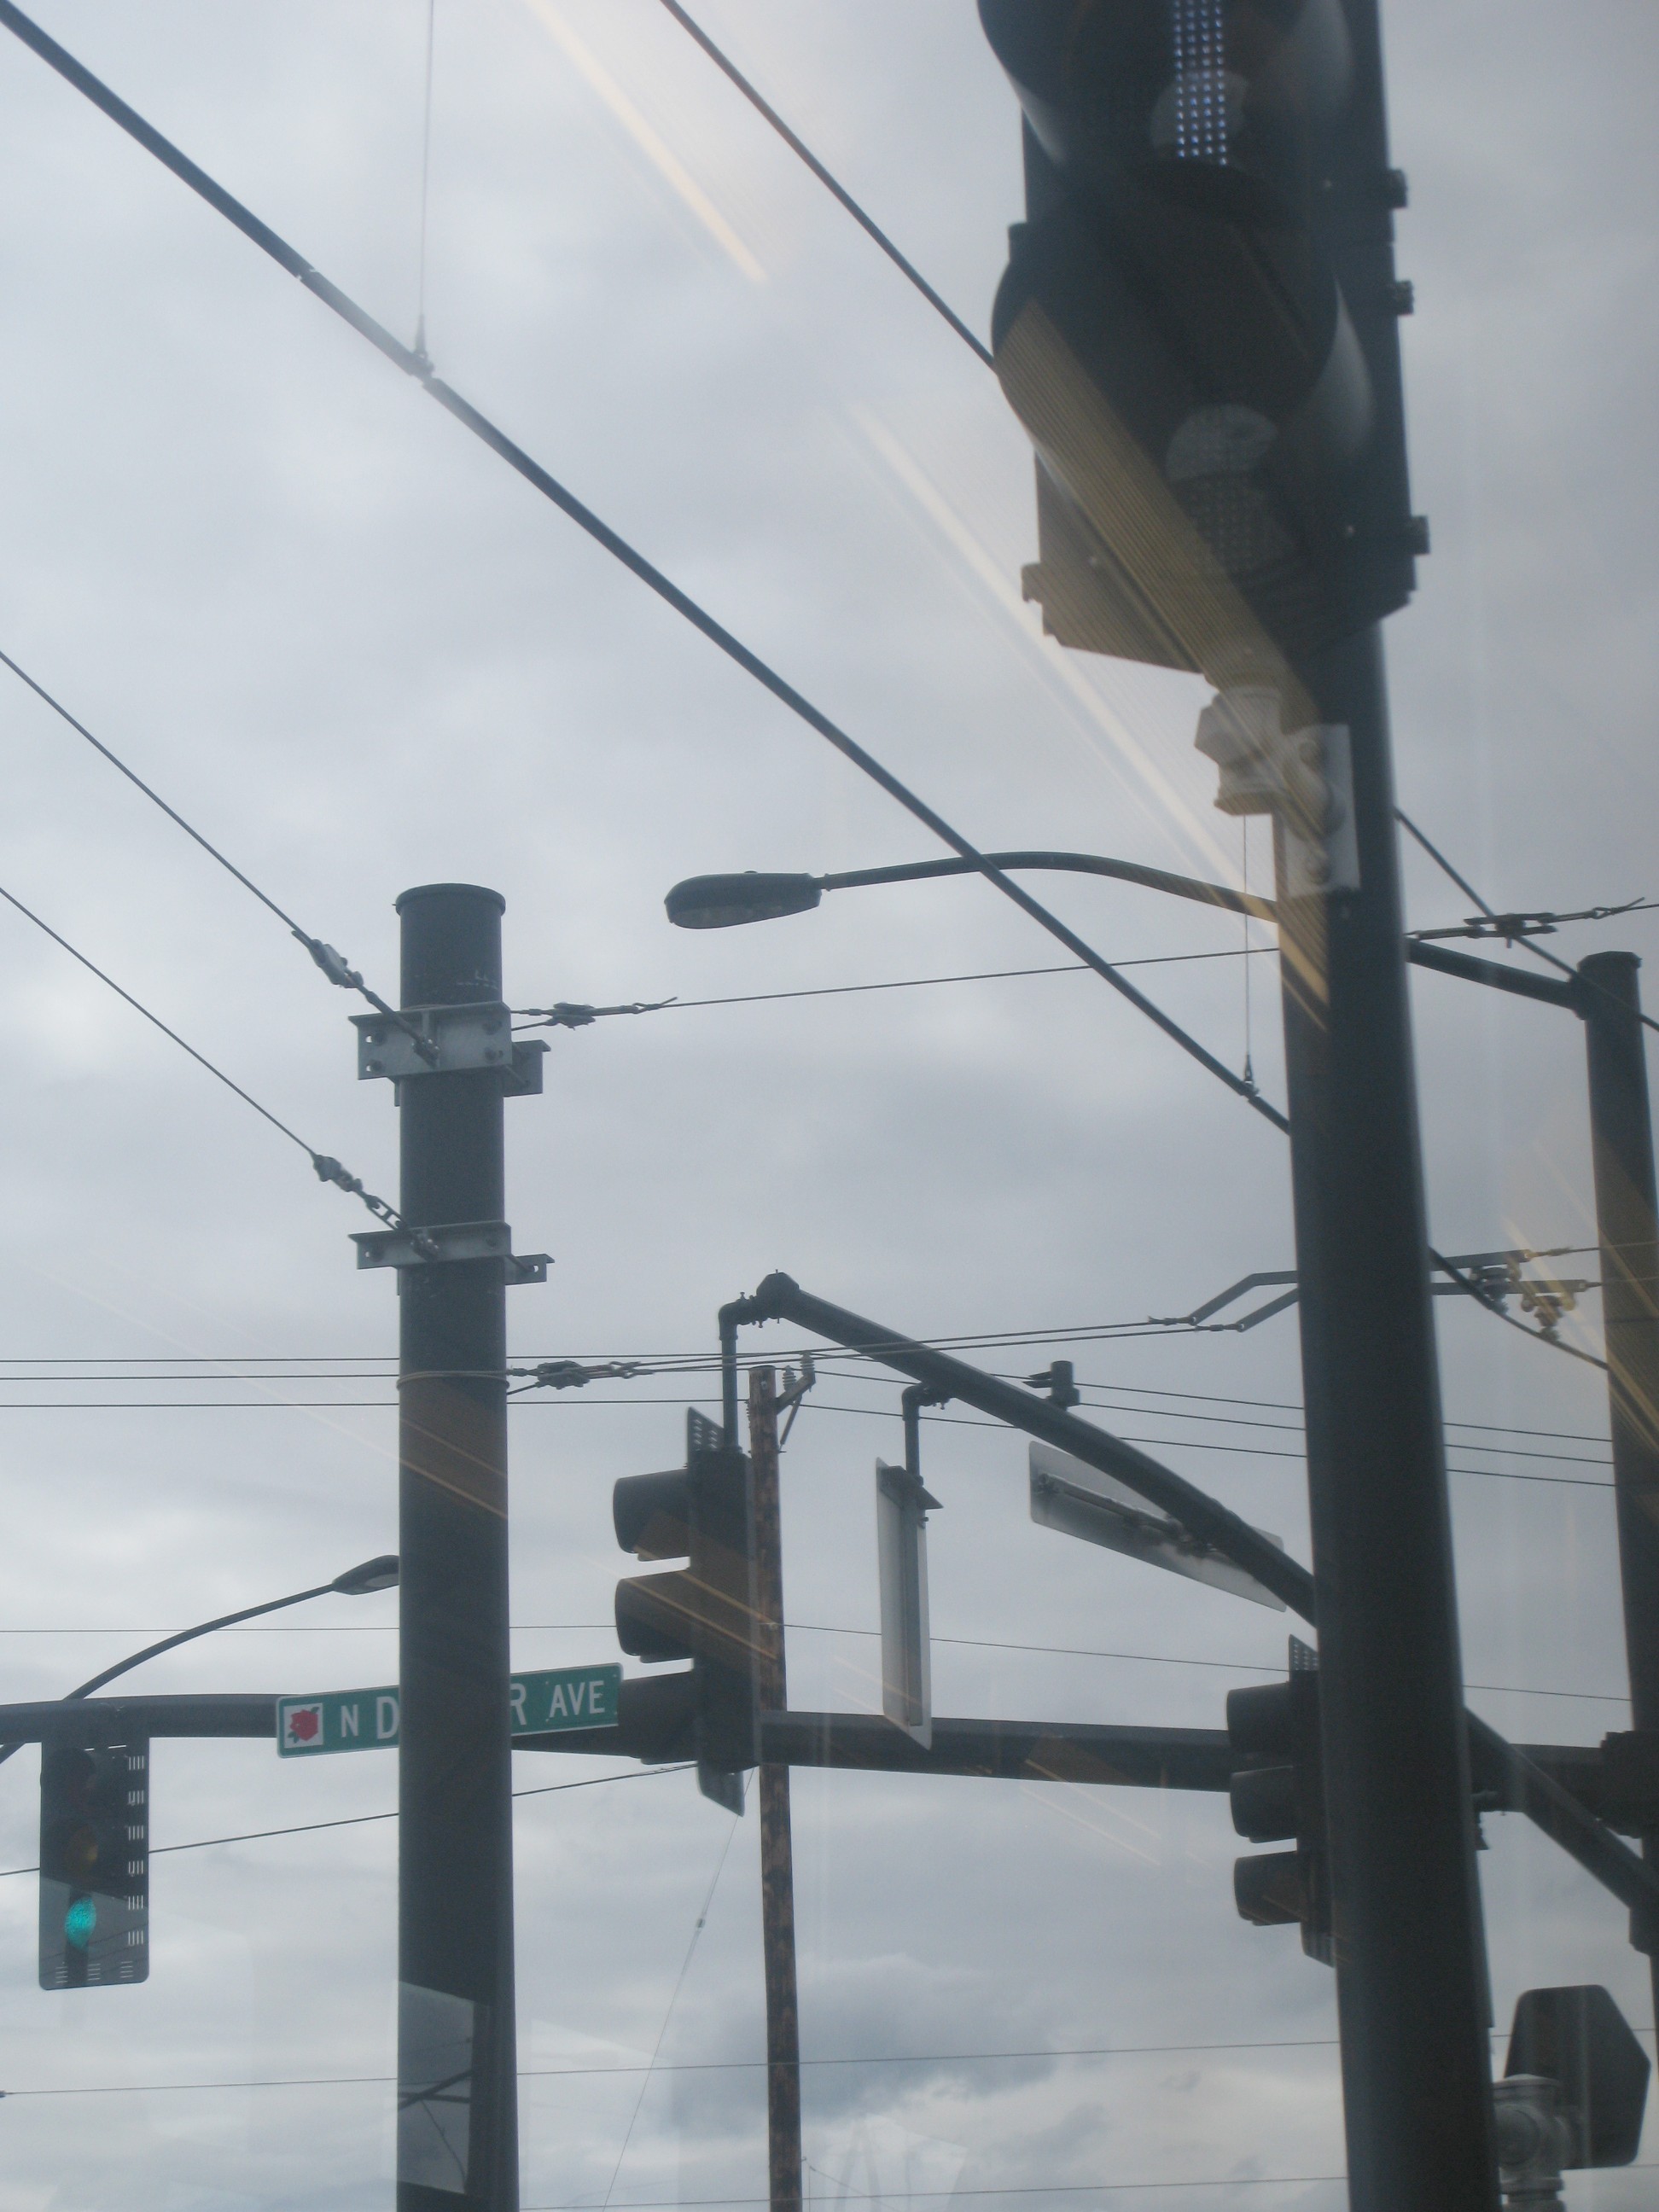
Looking east from NE 7th

The above picture (click for larger) shows what an eastbound train at NE 7th sees. Of interest is combination signal 20A immediately prior to the Lloyd Center platform. The zoom lens makes it look closer than it really is – a better perspective (though not as clear of a photo) is this old picture from when NE 7th was where trains would switch radio channels to Main 1 or Main 3. In that linked photo, 20A is the red light at NE 11th.

In this above photo, you can see that the intersection at 9th is has a permissive white vertical pre-empt. Now look down to NE 11th at the combination signal 20A, which is displaying a yellow horizontal. This informs the operator of an eastbound train at 7th that the power switch that can diverge a train into the Doubletree Siding is aligned to continue east, but 11th is not pre-empted yet. 20A will time out back to a red after a minute, which reactivates the magnet until the next train calls it.

Approaching Lloyd Center, eastbound.
ATS magnet visible in foreground, white vertical on 20A in background.

When 20A is red, that ATS magnet will stop an eastbound train before it gets to the intersection at NE 11th. Therefore, 20A must be called by a train before it can proceed through 11th into the Lloyd Center platform, but it needs a place to call 20A from. Rolling calls, or in other words, pressing the call button as you move over a call loop without stopping, are a poor practice. Trains should be at a complete stop over a call loop to call a signal, so there needs to be some place for a train to stop prior to NE 11th to call 20A, and that purpose is served by the NE 7th platform. When placing the call at 7th, rail operators will look down to 20A from there and make sure it drops from a red before proceeding.

The NE 7th platform is needed for trains to go east to ensure that the switches for Doubletree are properly set, so 7th doesn’t work as a stop that can be closed or skipped since a train will have to stop there anyway to call 20A. (Plus 710 NE Holladay right by the platform at NE 7th is a TriMet building, so it’s unlikely that front-door MAX service is going to go away from there.)

Then over at Oregon Convention Center…

Oregon Convention Center (OCC)

West from Convention Center

Looking at OCC on the western side of the Holladay alignment, there are two combination signals that affect train movement from OCC to into Rose Quarter: 18A and 18B.

Signal 18A is located on the corner of NE Holladay & 2nd for westbound trains. It is associated with switches 13A, 11C, and 11D and the ATS magnet (visible in the above picture as the little yellow square) on the opposite corner of NE 2nd. If any of those switches are not properly set for a westbound move from OCC or if there is a conflicting move in progress – for example, a vintage trolley coming out of the trolley barn or turnbacks like last weekend’s streetcar work, 18A will remain red and a westbound train will be tripped at the ATS magnet. To proceed through here, 18A needs to be called by westbound trains from a platform (remember, no rolling calls), which is why OCC is needed.

West from OCC, 18B visible (displaying a red aspect, click for larger and look on the Rose Quarter platform)

Way down there by the Rose Quarter special events platform is signal 18B, an ABS/pre-empt combination signal that routes a train into the westbound main (click for a more up-close picture of 18B), the special events track, or the trolley barn. Like 18A, 18B is called by westbound trains from OCC, and both need to drop from reds before a train can continue west into Rose Quarter. 18B doesn’t have an ATS magnet of its own (the magnet at 2nd for signal 18A will stop a train before it gets near 18B) but this signal is still necessary for route selection. Both 18A and 18B will time out back to reds and will need to be called by the next westbound train, ensuring that the switches are properly set and there are no conflicting moves by other trains. As a result, OCC is another platform that can’t be skipped or closed because westbound trains need a platform to call 18A and 18B from. Similar to NE 7th, since trains have to stop here anyway to call the signals, they may as well service the platform.

White vertical on 18A, yellow horizontal on 18B

So can either of these stops be closed, moved, etc? Not easily.. NE 7th eastbound and OCC westbound are currently necessary to call their respective ABS/pre-empt combination signals to ensure switch alignment/no conflicting moves by other trains. And while their corresponding westbound and eastbound platforms don’t have combination signals, operators will still call for pre-empt signals to proceed from there. At present, I don’t really see a way to avoid stopping at both of these platforms despite the relatively low passenger on- and off-boarding at these locations. This isn’t to say that it can’t ever be done, but I don’t think skipping either of those platforms can be done as an immediate fix.

Sweep train

A while back I mentioned sweeping but didn’t explain what that meant, though you might have guessed it had something to do with checking the alignment. It does – in the interest of safety (no surprises there – you’ll notice that is the predominant theme here), whenever a train hasn’t passed over a section of the alignment in several hours, the first train through that area is a sweep train. The sweep trains run at lower speeds to do a safety check on the alignment.

This is not a sweep train picture, or even a train operating before sunrise. It is, however, a train operating under low lighting and I’m going to say that’s the next best thing. I have no directly relevant photographs for this post.

Under normal operating conditions, the regular sweeping is done by the first train every morning through each area of the alignment. This is built in to the runs for those trains:

Note at the bottom of the paddle for the first train out of the Ruby yard, which sweeps Burnside, the Banfield, Holladay, and Interstate.

And here’s that first Yellow Line on the TriMet timetable – the sweep train takes 19 minutes to get to Gateway and then another 20 minutes to get to Rose Quarter, but the Blue Line that leaves Cleveland at 4:06 (and all the ones after it) will take 17 minutes from Ruby to Gateway and then 15 minutes from Gateway to Rose Quarter. Those trains can travel at full speed once the alignment has been swept.

Sweep speed is 25 mph or the posted speed limit, whichever is less – so the sweep train from Rose Quarter down 5th Ave to the Jackson turnaround at PSU is going to do 15mph, not 25. Point of trivia – 25mph is the slowest speed a train can go down Burnside (where the speed limit is 35mph) and still make all of the pre-empts before they time out.

In the event of sweeping after an emergency – such as an earthquake, as mentioned in the other post, it’s reasonable to expect that Control will ask for restricted speed in the sweep trains rather than the standard 25mph. Restricted speed for MAX trains is 20mph or the posted speed, whichever is less, but always at a speed that would allow the operator to stop within 1/2 their sight distance.

I lied – More signals!

Okay, I forgot two.

Dwarf Signals

Ruby Jct/E 197th, looking eastDwarf signal in lower left corner

I love this picture because there’s so much going on in it.  Ruby Jct/E 197th looking east, zoomed in (I took the picture from the westbound platform) so the quality is a little grainy and the distance is flattened out – objects in the picture are much farther away than they appear!

I forgot the dwarf signals because under normal operating conditions, you don’t really see them because they don’t face you. Dwarf signals for MAX are only used when running reverse – notice how in the above picture which is facing east, the dwarf signal is on the westbound track, so you’re only going to see it if you’re going east in the westbound.

Anyway, the purpose of dwarf signals are to protect power switches on the mainline when you’re running reverse in ABS territory. They won’t display any aspect other than red, though some will go dark if there’s no train in the circuit. They’ll be associated with ATS magnets and switches.  When running reverse without signal protection, you must stop at all switches to make sure they are properly set since you’ll be coming at them from the wrong direction.

Dwarf signal at BTC“Dwarf” not always short

Here’s dwarf signal W768 and two standard ABS signals at Beaverton Transit Center looking east.  They’re all the same height, but the dwarf is the only one that can only display a red aspect.  In this picture it’s dark because there’s no train in the circuit.

Same signal, now with a train in the circuit (in the westbound platform)

That particular signal protects the switches that Red Line trains take into the center pocket track at Beaverton Transit Center – which are located pretty far around that curve, so dwarf signals aren’t always right on top of associated switches.

The C Signal

For lack of a better name, anyway.

C

There’s only one of these that’s still in use, and it’s at Skidmore Fountain westbound (there is also one at 11th & Yamhill, but it is not active). The intersection after this platform is SW Ash, but you can’t see it from here, so when an operator selects at Skidmore westbound, the “C” signal illuminates to let them know that the call went through and they can leave the platform.  When they get to Ash, they should have their pre-empt.

Next up – not sure yet, but it won’t be signals!

Signal Series – ABS/Pre-empt Combination Signals

Okay, back to signals.  So there are your ABS signals, which indicate both track occupancy and switch position (by showing which route you are going on)

And then there are the pre-empt signals, which permit trains to go through intersections where the trains and cars run in mixed traffic.

But since pre-empts on their own don’t tell you anything about how switches are set or train occupancy, when in pre-empt territory you need…

ABS/Pre-empt combination signals

Which I admit I have a tendency to short to “combination signals” and then even from that to “combo signals” because that’s altogether kind of a mouthful.

Signal W2, a combination signal located at the 11th Ave Terminus

Combination signals can display both the red aspect of an ABS signal, indicating STOP as well as the yellow horizontal and white vertical aspects of a pre-empt signal.  They are used in pre-empt territory for several reasons:

1. To switch a train to a secondary or tertiary route

2. To indicate occupancy of someone else in the circuit

3. To prevent a train from moving into a conflicting move

4. To keep trains from going on the Steel Bridge if/when a bridge lift is in progress

Diverging to another route

Remember how the number of aspects lit on an ABS signal tells you which route you’re going on? (one aspect = primary route; two aspects = secondary route; 3 aspects = tertiary route, etc).  Well it’s the same with ABS/pre-empt combo signals.  I’ll keep using W2 as an example. If it helps, here is the 11th Ave terminus from above. W2 is located on the corner of 11th and Morrison and is used by trains heading west.

For Blue (westbound to Hillsboro) and Red (westbound to Beaverton Transit Center) trains under normal operating conditions, W2 will pretty much behave as a regular pre-empt signal once the operator places their call for W2 at Galleria.

Red on W2Red on W2

This indicates STOP and is what W2 looks like by default until an operator selects their route from the Galleria platform. Similar to a red on an ABS signal, reds on combination signals will be associated with ATS magnets that a train cannot move over.

Yellow horizontal W2Yellow Horizontal on W2

When an operator of a Blue or Red line train is at Galleria, they watch W2 (which is a block away) and wait for the red to become this yellow horizontal. That shows that their switches are set to continue straight on to Hillsboro/Beaverton (primary route, so one aspect), and by the time they get up to the intersection of SW 11th & Morrison, it (should!) turn to this:

White vertical on W2White vertical on W2

Which, as you already know, indicates “proceed with caution.” Because you get dumbass cyclists like that one biking against the light.  Good job, unknown cyclist – lucky for you that train was going straight and not going to hit you as you cycled across the diverging tracks!

11th ave switchesSwitches into 11th Ave Terminus

Here’s how the switches look to an operator – the train I was on when I took this photo was a Blue Line stopped at Morrison. This train would be continuing west instead of diverging into the terminus, and so the switches are set for the primary route, which is to head west towards Beaverton/Hillsboro. You can see the yellow horizontal on W2 in the top left corner of the picture, which indicates that the switches are set for the primary route but we can’t enter the intersection yet.

When Yellow Line trains used to turn around at 11th Ave, they’d get a different aspect after selecting their signal from Galleria:

Red over yellow horizontalRed over yellow horizontal on W2

The indication of this signal is “STOP – switches are set for something other than the primary route (more than one aspect), but you don’t have pre-emption to enter the intersection yet” – these aspects would display for trains diverging into the terminus after their switches were set and before the permissive white pre-empt aspect(s) came up.

So my picture of W2 showing a red over white diagonal over white vertical aspect indicates permission to proceed with caution on the tertiary route.  3 aspects  = tertiary route. The tertiary route from W2 is the easternmost diverging track into the terminus.

A secondary route on W2 would be the red aspect over just a white vertical, but I never got a picture of that – if all tracks at 11th Ave were empty, a Yellow Line train would first be put in the tertiary track, and the secondary track would be used if another Yellow Line train entered the terminus while the first was still there. That didn’t happen while I was standing there taking pictures that day.

Other combination signals that will show these same indications for primary, secondary, and tertiary routes can be found at end of the line signals W1760 immediately prior to the terminus at Hatfield in Hillsboro, and M164 which is the combo signal immediately prior to the Jackson turnaround for Yellow/Green Line trains at PSU.  There is also 18B into Rose Quarter from the east, which allows a train to continue on the normal westbound track (primary route), the special events track (secondary route), or the Vintage Trolley barn (tertiary route).

Secondary route, W1760Sorry for the blur but it’s the only picture that I have of an ABS/pre-empt combination signal displaying a secondary route – Secondary route on W1760 (under the car traffic light, it’s a red over a white vertical)

Circuit occupancy

On the other side of the 11th Ave terminus for eastbound trains is signal W6, another combo signal. An eastbound train coming up Yamhill can’t enter the terminus so W6 isn’t there for route selection, but a red on it will indicate that something else is in the circuit – either a train leaving the terminus, or a streetcar on 11th Avenue.

Red on W6 – because a train is leaving the terminus, so the ATS magnet associated with W6 will prevent an eastbound train from colliding with it

Permissive white vertical on W6 & eastbound train – you can see that the train that was pulling out of the terminus in the picture above this one is far enough ahead that it’s safe for this eastbound train to keep going.

Preventing a train from moving into another train’s conflicting move

There is a siding track that diverges off Holladay at 11th which used to be used by the Vintage Trolley and is occasionally used by MAX trains taken out of service (and yes, another combination signal – 20A – is used to make that diverging move).  Signal 20C at Lloyd Center westbound is associated with that siding track.

20C20C, Lloyd Center westbound

A train facing this direction has no option to choose a different route, but the combo signal will prevent a westbound train from moving forward if a train is going to go into or come out of the Doubletree Siding.

Steel Bridge Lift

All signals leading to the Steel Bridge (on the east side of the river that’s the Rose Quarter platform for Blue, Red, and Green trains and Interstate Rose Quarter for Yellow trains; and on the west side of the river that’s the Oldtown/Chinatown platform for Blue and Red trains, and the intersection of NE 3rd & Glisan for Yellow and Green trains) are combos. Whenever the bridge is lifted, it throws up reds on all of those surrounding signals.  As mentioned in the Automatic Train Stop post, although a yellow horizontal and a red both indicate STOP, a train still can physically move on a yellow horizontal, but it (by default) can’t move on a red.  So as soon as the bridge span is unlocked for a lift, all trains will be prevented from getting anywhere near it.

Red on M26Red on M26, the last mall signal before the Steel Bridge at 3rd & Glisan,  taken from trailing car of  a Yellow Line train

The interlocking of tracks around the Steel Bridge is extremely complex – on the west side, the Yellow and Green Lines cross the Steel Bridge from a different angle than the Red and Blue Lines, and then on the east side the Yellow Line turns north towards Expo and the other lines continue east.  Since all of those moves are done through switches in the rails, the combination signals will also display reds if another train is making a conflicting move (e.g. if a PSU-bound Yellow Line at Interstate Rose Quarter leaves the platform just before a westbound Red/Blue/Green line train tries to leave Rose Quarter), or if the switches aren’t set right for you – this is why sometimes you will be sitting on a Yellow or Green line train at 3rd & Glisan waiting to cross the bridge for a while (which means a Blue or Red left Oldtown/Chinatown and got onto the bridge before you got there), or similarly be sitting at Rose Quarter on a Blue, Red, or Green train waiting for a Yellow Line to get out of the way.

Reds on 16B and 16CReds on 16B (special events track at Rose Quarter) and 16C (main westbound track at Rose Quarter)

Both of those above ABS/pre-empt combination signals are capable of:

switching a train to another route (this is how trains can get from here over to the Expo Center from the Ruby Junction railyard – they can diverge from here)

preventing a train from moving if there is another train in the circuit

preventing a train from moving if the switches aren’t set right for them, and

stopping a train if the Steel Bridge is going to be lifted.

And that pretty much covers the last of the 3 major signal types used on the MAX light rail alignment.

Signal Series – Pre-empt Signals

The second type of signal that is used on MAX alignment are pre-empt signals. These are the signals that pedestrians, cyclists, and car drivers are going to see most often.

What they look like and what they mean

A basic pre-empt signal has two aspects on it – a yellow horizontal on the top and a white vertical underneath (there is an exception to this rule at Kenton/Denver where the white vertical and yellow horizontal share the same top aspect, and I don’t know why that one is set up that way. I know that that pre-empt is tied into the ABS circuit of the Vanport Bridge so that might be related, but I’m not positive.  I’ve never gone over there as a destination (the Dancin’ Bare just isn’t my thing) so I don’t have any very good pictures of the signal, but you can sort of see it in this photo taken from the passenger area.  The quality isn’t great, but it shows the white vertical on the top part of the signal instead of the bottom. There are some pre-empt signals that are slightly more complicated and I’ll get to that the last entry of the signal series, but here are the basics first.

Yellow HorizontalYellow Horizontal pre-empt

To a train at an intersection, this is the equivalent of a red traffic light.  To put it in rail terminology, the aspect (what the signal is displaying) is a yellow horizontal, and the indication (what that means) is STOP.  A train cannot enter an intersection on a yellow horizontal without first getting permission from Rail Control and following Standard Operating Procedures to move through the intersection on a yellow horizontal (if you ever are scanning the radio and hear an operator ask to “SOP an intersection“, it means their signal is a solid yellow horizontal and they don’t have the ability to change it to a white vertical on their own to keep going)

White VerticalWhite Vertical pre-empt

And this is the equivalent of a green light for a train.  The aspect is a white vertical; the indication is “proceed with caution” – kind of like when you have a green light in a car, you still need to scan the intersection in case someone on the cross street is running their red light or a pedestrian is about to cross. This happens a lot with trains because people tend to watch traffic signals, not rail signals at these intersections so they don’t know that a train necessarily has a “go” signal.

(I made these next animated gifs myself. Don’t I have great photo editing skills?  You should have already known that from my ticket machine monster)

Flashing white verticalFlashing White Vertical pre-empt

This signal’s aspect is a flashing white vertical, and its indication is the equivalent of a yellow light for a car – it means that the white vertical (go) is about to time out to a yellow horizontal (stop) – so if the operator hasn’t yet entered the intersection, they should stop the train.  Some intersections time out more quickly than others – if you are sitting towards the front of the train on the right side heading west into Lloyd Center, the pre-empt at 13th begins to time out as the train enters the intersection and you can see that from the passenger area.  Similarly, the pre-empt at 4th & Yamhill which is on the left-hand side will also begin to time out as the train is in the intersection.

Flashing yellow horizontalFlashing Yellow Horizontal pre-empt

This aspect is a flashing yellow horizontal. There isn’t a direct equivalent of this signal’s indication to what a car driver would see on a regular traffic light.  The closest would be when you are stopped at a red light and you watch the color of the cross-traffic light, and when that turns red you know yours will turn green soon.  For a rail operator, a flashing yellow horizontal pre-empt means that it will soon become a white vertical.  At most platforms downtown, this means they need to have their doors closed (and not on release!) so that they can get going as soon as their white vertical comes up.  For intersections along the Yellow Line and on Burnside (and a couple of intersections downtown such as Skidmore Fountain eastbound and Lloyd Center eastbound where the intersection is not immediately in front of the platform), operators are permitted/expected to be moving the train up to the intersection on a flashing yellow horizontal indication, but they may not enter the intersection until it displays a solid white vertical.

Go, stop, goSo is this a go?  Or a stop?  Depends on if you are a train operator, a car driver, or a pedestrian!  SW 16th & Yamhill

Now here’s where it can get a little confusing – in the CBD (downtown), not all of the intersections have pre-empts.  At several intersections, the trains will follow the same red-yellow-green traffic signals that car traffic does.  However, every intersection where a green light would permit a car to make a left turn is pre-empted. This can cause confusion for someone who misses a train and then gets mad, complaining that the train left the platform on a red light.  Well, yes, they did – but the red light wasn’t a STOP for them, it was just a stop for the cars.

Pioneer eastbound white vertical Pioneer Square, Eastbound

Notice how the traffic light is red, the pre-empt immediately next to it is a white vertical, and the crosswalk signal (all the way to the left of the image) is a walk. That’s because at this intersection of 6th and Yamhill, cars are permitted to make a left turn from Yamhill onto 6th – over the train tracks -when that light is green.  So the red light holds the cars there (otherwise they’d be turning directly into the moving train!) and the train will go first on their pre-empt.  The parallel crosswalk is a walk sign because the train is going to block cross car traffic on 6th.

Pioneer Square westbound has the same setup:

Pioneer Square westboundPioneer Square Westbound

Again – red traffic light, walk sign on the crosswalk, and the white vertical pre-empt (it’s a little hard to spot – look between the two lights on the lamppost) – and obviously a train moving through the intersection!

Where you find pre-empt signals

Pre-empt signals are used in areas where the trains run in mixed traffic and intersections are protected by traffic lights, not crossing gates.

Map of pre-empt territoriesAreas in orange are pre-empt territories

Similar to the ABS map, the above map isn’t perfect because some platforms on the borders of ABS and pre-empt territories have an ABS signal in one direction but a pre-empt in the other, or both an ABS and a pre-empt in one direction, but it gives you an idea of where these signals are found. From west to east:

Hatfield Government Center to 12th/Washington

Out of the tunnel (there is a pre-empted intersection just west of the Goose Hollow platform) and all of the CBD, including the 5th/6th Ave transit mall and Yamhill & Morrison streets.

Over the Steel Bridge, the Yellow Line is pre-empted through Delta Park. The Blue/Red/Green Lines are pre-empted through 13th Ave, east of Lloyd Center.

The Blue Line is pre-empted from the intersections prior to E 102nd Ave on Burnside to the intersection just before the Ruby Junction/E 197th Ave eastbound platform.

Pre-empt signals on their own are pretty straightforward, so they only get one post.  Up next, what should be the last post about signals (at least for now), ABS/pre-empt combination signals!